Print Back
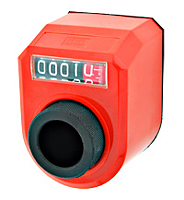
Digital Position Indicator - Direct Drive
Installation Instructions for DD51 and DD52
1. Zero set the spindle.
2. Fit the indicator onto the spindle.
3. Mark the machine frame by means of the rear locating pin by rotating the indicator (do not use a hammer).
4. Pull out the indicator and drill a ΓΈ 6mm by 10mm deep hole.
5. Re-fit the zeroed indicator onto the spindle and make sure the rear pin locates into the hole.
6. Tighten the socket head set screw.

Elesa Original Design
Digital Position Indicator Direct Drive
Digital Position Indicator - Direct Drive
Unit of Measure
Items Digital Position Indicator Direct Drive
CE986103
Digital Position Indicator - Direct Drive
Digital Position Indicator Direct Drive
CE986104
Digital Position Indicator - Direct Drive
Digital Position Indicator Direct Drive
CE986133
Digital Position Indicator - Direct Drive
Digital Position Indicator Direct Drive
CE986134
Digital Position Indicator - Direct Drive
Digital Position Indicator Direct Drive
CE986153
Digital Position Indicator - Direct Drive
RPM (Max.) N/A 500 N/A 500 N/A 250 N/A 250 N/A 1500
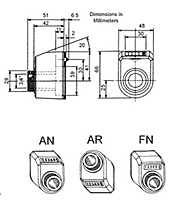
Type N/A AN
Reading After 1 Revolution N/A 000.50 N/A 000.50 N/A 001.00 N/A 001.00 N/A 0001.00
Clockwise / Counter clockwise Rotation direction increasing N/A Clockwise N/A Counter Clockwise N/A Clockwise N/A Counter Clockwise N/A Clockwise
Note N/A Please do not use a hammer for installation tip 3.